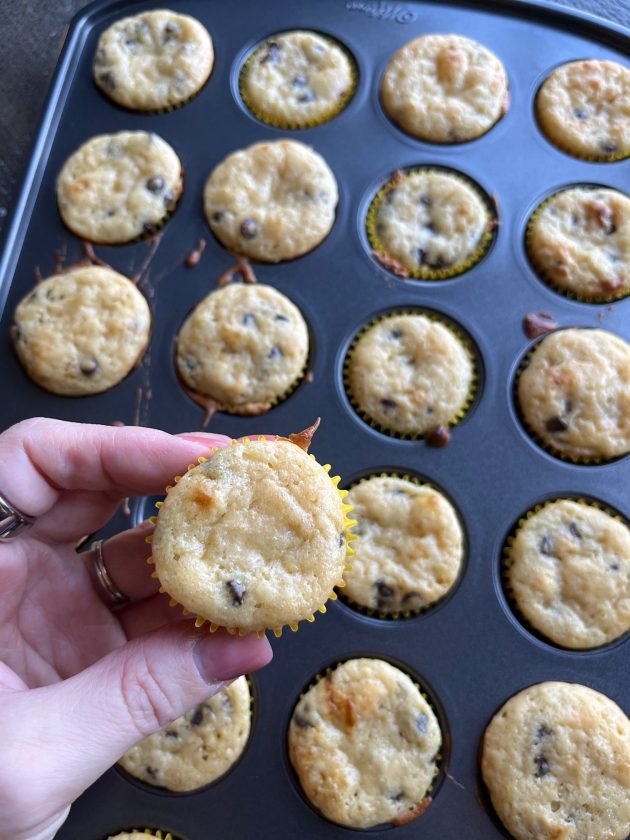
Mini muffins have long been a favorite snack, especially among children, for their convenient size and delightful taste. While store-bought versions like Little Bites are popular, crafting them at home offers a healthier and more cost-effective alternative. This homemade mini muffin recipe captures the essence of the beloved store-bought variety, ensuring a treat that’s both delicious and mindful of ingredients.
Why Opt for Homemade Mini Muffins?
Preparing mini muffins at home provides several advantages:
- Healthier Ingredients: Control over what goes into your muffins allows for the use of wholesome components, reducing additives and preservatives commonly found in commercial products.
- Cost Savings: Homemade batches are significantly more economical than purchasing pre-packaged versions, offering substantial savings over time.
- Customization: Tailor the recipe to suit dietary preferences or to experiment with various flavors and add-ins.
Ingredients for Homemade Mini Muffins
To create these delightful treats, gather the following ingredients:
- All-Purpose Flour: 1 cup
- Baking Powder: 1 teaspoon
- Baking Soda: ½ teaspoon
- Salt: ¼ teaspoon
- Greek Yogurt: 1 cup (plain)
- Maple Syrup: ⅓ cup
- Butter: ¼ cup, melted and slightly cooled
- Eggs: 2, lightly beaten
- Pure Vanilla Extract: 2 teaspoons
- Mini Chocolate Chips: ¾ cup
Step-by-Step Preparation
- Preheat the Oven: Set your oven to 375°F (190°C). Line a 24-cup mini muffin pan with mini muffin liners to prevent sticking.
- Combine Dry Ingredients: In a medium-sized bowl, whisk together the all-purpose flour, baking powder, baking soda, and salt.
- Mix Wet Ingredients: In a separate bowl, blend the Greek yogurt, maple syrup, melted butter, lightly beaten eggs, and pure vanilla extract until well combined.
- Integrate Wet and Dry Mixtures: Gently fold the wet ingredients into the dry mixture, stirring until just combined. Avoid overmixing to ensure a tender texture.
- Add Chocolate Chips: Carefully fold in the mini chocolate chips, distributing them evenly throughout the batter.
- Fill the Muffin Cups: Using a small spoon or cookie scoop, fill each lined muffin cup with approximately 1½ tablespoons of batter, nearly reaching the top.
- Bake: Place the muffin pan in the preheated oven and bake for 10–12 minutes, or until the edges are lightly golden and a toothpick inserted into the center comes out clean.
- Cool and Serve: Allow the muffins to cool in the pan for about 2 minutes before transferring them to a wire rack to cool completely.
Customization and Variations
The beauty of this recipe lies in its versatility. Consider the following adaptations:
- Flavor Additions: Incorporate ingredients such as fresh berries, nuts, or dried fruits to introduce new flavors and textures.
- Dietary Adjustments: For a dairy-free version, substitute the Greek yogurt with a plant-based alternative and use dairy-free chocolate chips.
- Sweetness Levels: Adjust the amount of maple syrup to suit your preferred sweetness, keeping in mind that alterations may affect the batter’s consistency.
Storage and Freshness Tips
To maintain the freshness of your homemade mini muffins:
- Room Temperature: Store the muffins in an airtight container at room temperature for up to 3 days.
- Refrigeration: For extended freshness, refrigerate the muffins for up to a week.
- Freezing: These muffins freeze well. Place them in a single layer on a baking sheet to freeze individually, then transfer to a freezer-safe bag or container. They can be stored frozen for up to 3 months.
Conclusion
Crafting homemade mini muffins not only offers a delectable snack but also empowers you to make healthier choices for your family. By embracing this simple recipe, you can enjoy the familiar comfort of mini muffins while reaping the benefits of homemade goodness. Whether for breakfast, a lunchbox treat, or an afternoon snack, these mini muffins are sure to delight both young and old alike.


